FAQ
Pre-sales


If you have questions about ordering the remaining accessories, you can send us your pool lighting requirements.
We will provide a free lighting plan and a recommended product list. Pre-sales support email: sa.us@paneralux.com
A: First, you need to reserve outlet holes & conduits for the power cables. Since the power cable of the pool light strip must pass through a conduit before connecting to the controller, the reserved outlet holes & conduits must be large enough for the cable to pass through.
We offer two types of power cables:
Cable with IP67 waterproof connector at the end, which can connect directly to the controller:
One light strip: outlet hole & conduit inner diameter ≥ 20mm / 0.79''
Two light strips: outlet hole & conduit inner diameter ≥ 30mm / 1.18'' (staggered insertion required)

Cable with bare wire + IP67 waterproof junction box at the end, which must pass through the conduit before connecting to the junction box:
One light strip: outlet hole & conduit diameter ≥ 11.5mm / 0.45''
Two light strips: outlet hole & conduit diameter ≥ 23mm / 0.9''

Next, confirm the installation location of the light strip:
Under the pool coping: ensure the coping overhang is ≥ 30mm / 1.18'' and it is not a bullnose shape.
Pool wall – above waterline: confirm whether recessed installation is required. If recessed installation is needed, a groove must be prepared in advance.
Pool wall – below waterline: ensure the installation depth does not exceed 2m / 6.56'.
We have extensive experience in pool lighting design and can provide a free lighting plan. For further questions, please contact us: sa.us@paneralux.com


1 pc 82' T1512 V3 RGB Pool Light Strip (Required)
1 pc 24.6'' T1512 V3 RGB Pool Light Strip; cut to 18' by seller (Required)
1 pc 5pin Distributor (Required)
1 pc RGB Controller (Required; Max load 164')
1 pc RGB Remote Control (Optional)
1 pc 200W Power Supply (Required)
7 packs Mounting Buckles (Required)
The following information is also needed to confirm the complete product list:
1. Diameter of the reserved power cable outlet hole and conduit.
2. Distance between the power outlet and the electrical box.
3. Installation location of the light strips: under the pool coping or on the pool wall.
We recommend that customers send their complete pool lighting requirements to: sa.us@paneralux.com
Our engineers and pre-sales team will provide you with a customized lighting solution and quotation.
Jandy SMARTSYNC 60W LED Adapter
Jandy/Pentair/Hayward 300W Transformer
Jandy/Pentair/Hayward Automation System
PaneraLux provides the following products:
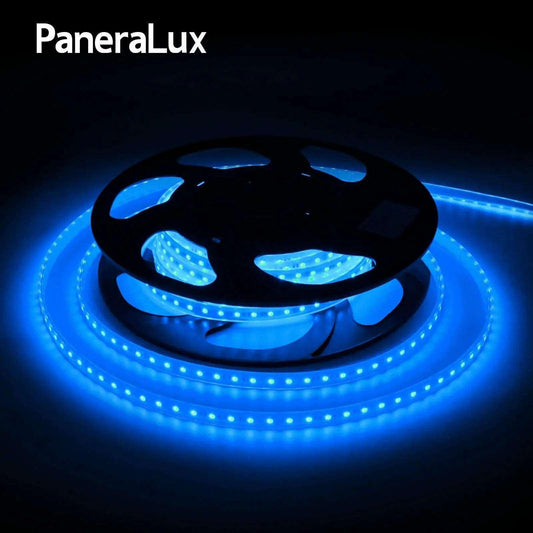
T1512 V3 RGB Pool Light Strip
Connectors
IP67 RGB Signal Amplifier
Power Supply (Transformer)
Installation Accessories
Please provide detailed pool specifications and lighting requirements. Our pre-sales team will provide you with a free lighting layout and product list: sa.us@paneralux.com
Wi-Fi controller and App connection method:
A. Enable Bluetooth on your phone and connect to 2.4GHz Wi-Fi. Download the PaneraLux App via the QR code on the controller and complete the registration to access the app's home page.
B. The connection steps between the Wi-Fi controller and the app are as follows: Set the controller to either single-color or RGB mode, enter pairing mode, and then pair with the app. Note: The controller indicator light in white indicates white & blue light mode, and in red indicates RGB mode.
Using RGB controller as an example:
Our app can control 2 or more Wi-Fi controllers at the same time, the steps are as follows:
1. Follow the steps above to pair all controllers with the App.
2. Rename each controller for easy operation. Click the paired controllers to enter the single controller interface, click the Edit button on the upper right corner to change the controller name, for example: "controller A", "controller B", "controller C" …etc
3. Enter any controller interface, find "Create Group" in the upper right corner of the editing page, add all the paired controllers successfully and save it.
4. Enter the group interface, you can synchronize all the paired controllers.
a). Enable Bluetooth on your phone and connect to 2.4GHz Wi-Fi. Download the Paneralux App via the QR code on the controller and complete the registration to access the app's home page.
b). Power on the Zigbee gateway and ensure that the pairing indicator light is rapidly flashing red, and the blue light is steady. (If the indicator light shows a different status, press "Reset" for 5 seconds until the red light flashes rapidly.)
c). Make sure your phone is connected to the 2.4GHz Wi-Fi. Open the Paneralux App, click the upper right corner "Add Device", then add Zigbee gateway, select "Gateway Control," and click "Wireless Gateway (Zigbee)."
d). Enter your 2.4GHz Wi-Fi account and password on the page. (5G Wi-Fi is not supported.) Once the app detects the Zigbee gateway, click "+" to complete the connection.
Connection between Zigbee controller and App:
e). After successfully adding the gateway, return to the home page and click "Gateway" - "Add Sub-device."
f). Set the controller to single-color/RGB mode. Note: The white light on the controller indicates white & blue light mode, and the red light indicates RGB mode. Using RGB controller as an example:
(Paneralux controllers are pre-configured to the corresponding light modes before shipping. Example: if you've purchased RGB pool light strips, the controller you receive is already set to RGB mode. You can start from step 3 to complete the connection between the controller and the App.)
Step1. Long-press the controller button; after 3 seconds, the purple light will go off and then light up.
Step2. Keep pressing the button to enter the light mode selection. The indicator light will cycle through white-yellow-red-green-blue lights. Release the button when the indicator light turns red, and then it will blink purple. The controller is now in RGB mode.
Step3. Quickly press the controller button twice, and both the indicator light and the light strip will rapidly blink purple. The controller enters pairing mode.
Step4. On the app's home page, click "Add device" to enter a new page. Under "discovering devices," click "Add," and then click "+" to select the controller. (At this point, a Wi-Fi connection page will appear. Input your home Wi-Fi information.)
Step5. Wait a few seconds for the controller and app to successfully connect. (If the connection fails, you can click to reconnect.)
Wi-Fi controller and App connection method:
Enable Bluetooth on your phone and connect to 2.4GHz Wi-Fi. Download the Paneralux App via the QR code on the controller and complete the registration to access the app's home page.
The steps to connect the Wi-fi RGBW controller to the App are as follows: first set the controller to RGBW mode, then enter pairing mode, and finally pair it with the App.
Long-press the button on the controller; after 3 seconds, the indicator light will go off and then light up in purple.
Keep pressing without releasing to enter the light mode selection. The indicator light will cycle through white-yellow-red-green-blue lights. Release the button when the indicator light shows green. The indicator light will flash purple light twice and then stay green. Then the controller enters RGBW mode.
Quickly press the controller button twice, and both the indicator light and the light strip will rapidly blink purple. The controller enters pairing mode.
On the app's home page, click "Add device" to enter a new page. Under "discovering devices," click "Add" and then click "+" to select the controller. (At this point, a Wi-Fi connection page will appear. Input your home Wi-Fi information; 5G Wi-Fi is not supported at this time.)
Wait a few seconds for the controller and app to successfully connect. (If the connection fails, you can click to reconnect.)
Using the RGB remote control as an example:
Step1. Set the controller to RGB mode. Long-press the button on the controller for 3 seconds. After this, the purple light on the controller will turn off and then light up again.
Step2. Keep holding the button without releasing it. The controller will enter the light mode selection.
Step3. The indicator light will cycle through white-yellow-red-green-blue lights. Release the button when the indicator light turns red. After two purple blinks, the indicator light will remain red. The controller is now in RGB mode.
Step4. Press the button on the controller once. The indicator light on the controller will blink. At the same time, press and hold the power button on the remote control. When the indicator light on the remote control turns on, it means the connection is successful.
Note: The connection process for both single-color and RGB remote controls is the same. To avoid repetition, users can proceed directly to step three after completing the connection between the controller and the app.
Side Mounting Buckle is used for installation on the pool wall.

Top Mounting Buckle is used for installation under the pool deck.

Plastic profiles are used for recessed or surface-mounted installation in rectangular pools.

You can send us the details of your pool, and our engineers will recommend the most suitable installation accessories and mounting method: sa.us@paneralux.com
1. Ensure that the smart device has been added to the SmartLife App or Tuya App and is online.
2. Ensure that the Alexa App is installed.
Method 1: Operate through the SmartLife or Tuya app
1. Open the SmartLife or Tuya app, tap Me at the bottom right, then find and tap Google Assistant.
2. Tap Connect to Google Assistant.
3. The app will open the Google Home app automatically. Tap Link.
4. Tap Confirm Authorization.
After loading is complete, the smart device will be synced to Google Assistant. You can now control the smart device through Google Assistant or the Google Home app.
Method 2: Operate through the Google Home app
1. Open the Google Home app and tap the "+" icon in the top left corner.
2. Tap Set up device.
3. Tap Works with Google.
4. Search for SmartLife or Tuya, then select it.
5. Tap Link.
A login page for SmartLife or Tuya will open—enter your account credentials to complete authorization.
1. Ensure that the smart device has been added to the SmartLife App or Tuya App and is online.
2. Ensure that the Alexa App is installed.
Method 1: Operate through the SmartLife or Tuya app
1. Download the Alexa app and sign in with your Amazon account.
2. Open the SmartLife or Tuya app → Home Page → Me → Third-party Voice Services → Alexa.
3. Tap Sign in with Amazon. The Alexa app will open automatically. Tap LINK to complete the connection.
Method 2: Operate through the Alexa app
1. Download and log in to the SmartLife or Tuya app.
2. Open the Alexa app and tap More in the bottom right corner.
3. Tap Skills & Games, then tap the search icon and enter SmartLife or Tuya.
4. Select the SmartLife or Tuya skill, enter the Skill Details page(ENABLETOUSE), and tap ENABLE TO USE,back to Agree and Link. The page will return to the Alexa app.
5. Tap CLOSE, then tap DISCOVER DEVICES to finish the connection.
The power supply output needs to be connected to the controller:
a. Connect the transformer output wires to the controller: insert the red wire into the controller "+" terminal, and the black wire into the "–" terminal, then tighten.
b. After wiring is completed, screw the end cap of the waterproof box tightly to ensure IP67 waterproof protection, and secure the top cover with screws.
Power input connection to the mains:
a. Unscrew the end cap of the waterproof junction box, and feed the high-voltage cable (provided by the customer) into the box.
b. Insert the three conductors into the terminal block: brown for live (L), yellow-green for ground (PE), and blue for neutral (N).
c. After wiring, tighten the end caps on both sides to ensure IP67 waterproof protection, and secure the top cover with screws.

2. If your pool is not yet fully constructed and only has design drawings. We suggest you to send us the complete pool design drawings. (We will calculate the length of the pool strip for you according to your needs.
3. If your swimming pool has already been constructed. Please let us know the dimensions of the pool area where you want to install the pool light strip and make sure the data is accurate.
4. In order to avoid ordering insufficient length of swimming pool light strip, we suggest customers to order longer length of light strip appropriately. For example, if you need 35m/114.8ft of pool light strip, please order 1*pc 20m/65.6ft pool light strip + 1*pc 15m/49.2ft pool light strip. We can customize the pool light length for you.
1. The customer calculated the pool perimeter based on the design drawings, but the actual pool perimeter differs from the drawings.
2. Installation errors caused a discrepancy, resulting in the light strip being too short.
3. The light strip itself has a 1.3" dark section at the beginning, which is due to the structural design of the strip.
Customers can purchase pool light strips according to the actual measured length.
If you are not sure, you can increase the length of the pool light strip by 5~10cm/2~3'' appropriately, as the light strip is flexible does not affect the actual installation.
Install


When using screws to secure the Side Mounting Buckle under the pool coping, ensure that the coping thickness is at least 35 mm (1.4"); otherwise, the pool coping may crack. We recommend using adhesive to secure the mounting buckles under the pool coping
Light strip power input waterproof junction box (used when the pool conduit diameter is <20mm, for connecting the LED strip input bare wires to the controller).
This accessory consists of a waterproof box and terminal blocks, and the installer needs to complete the wiring.
The 2-in 2-out terminal block is for single-color pool LED strip power wires.
The 5-in 5-out terminal block is for RGB pool LED strip power wires.

After-sales Service
Pool lights
-
PaneraLux Colored IP68 Underwater Pool Light Strip(T1512 V3.0)
Regular price From $349.00 USDRegular priceUnit price per$189.00 USDSale price From $349.00 USD -
PaneraLux LED Pool Lights Single Color (T1512 V3.0)
Regular price From $319.00 USDRegular priceUnit price per$178.80 USDSale price From $319.00 USD -
PaneraLux Above Ground Pool Lights
Regular price From $251.00 USDRegular priceUnit price per -
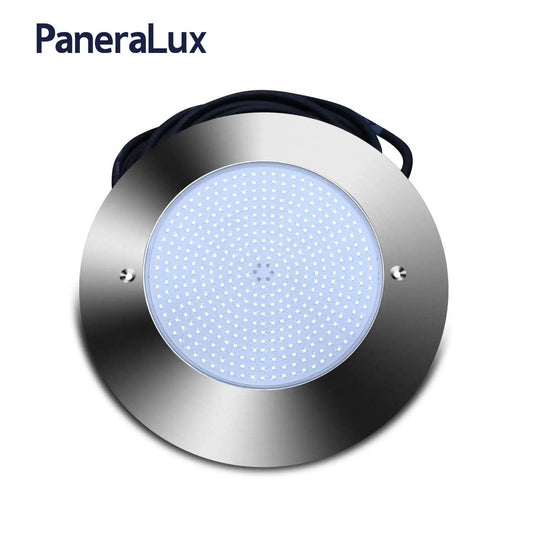
PaneraLux Underwater Pool Lights
Regular price $649.00 USDRegular priceUnit price per